
There are several ways to extract files in Purrchiver, ranging from “drop and forget” to “I want this one file from a 10-GB archive.”
1. Extract everything (the common case)
To extract the whole archive:
- From Finder: right-click the archive, choose Services → Extract using Purrchiver. Each archive extracts to its sibling folder; a single Purrchiver window opens with the queue + per-archive progress.
- From the Loaded window: click the extract icon (a downward arrow) at the top of the archive-contents pane, or press ⌘⇧E (also Tools → Extract Archive…). Pick the destination in the standard macOS folder picker.
- From Finder, multiple archives at once: select several archives, right-click, Services → Extract using Purrchiver. They all extract in one Batch Extract window with per-row progress.
Where extracted files land — the smart-default rules
Purrchiver picks a sensible destination automatically:
- Single-root archive (every entry shares one top-level folder): extracts
that folder as-is, no extra nesting.
MyProject.zipcontainingMyProject/...extracts toMyProject/in your chosen destination — notMyProject/MyProject/. - Loose-files archive (multiple top-level entries): creates a folder
named after the archive (minus the extension).
photos.zipwith 20 loose JPGs extracts tophotos/, not 20 files scattered into your destination folder. - Default destination:
- Drag-onto-dock: archive’s parent folder.
- Services → Extract using Purrchiver: archive’s sibling folder (always — this Service ignores the General-pane double-click preference).
- Double-click in Finder: whatever you chose under Settings → General → “When I double-click an archive in Finder” (open in Purrchiver to inspect, extract immediately to the archive’s parent folder, or ask each time).
- In-app Extract…: the folder you pick in the standard macOS picker.
2. Extract a selection
Open the archive. In the right pane, select the entries you want — click, ⌘-click, or shift-click to select multiple. Then drag them to the left pane (the dual-pane filesystem view) — they extract there.
Or right-click a row (or selection) and choose Extract Selected to… (⌘⌥⇧E) to extract just that item — or the whole selection, if the clicked row is part of it — to a folder you pick.
(You can also drag the selection straight out to a Finder window or the desktop — see section 3.)
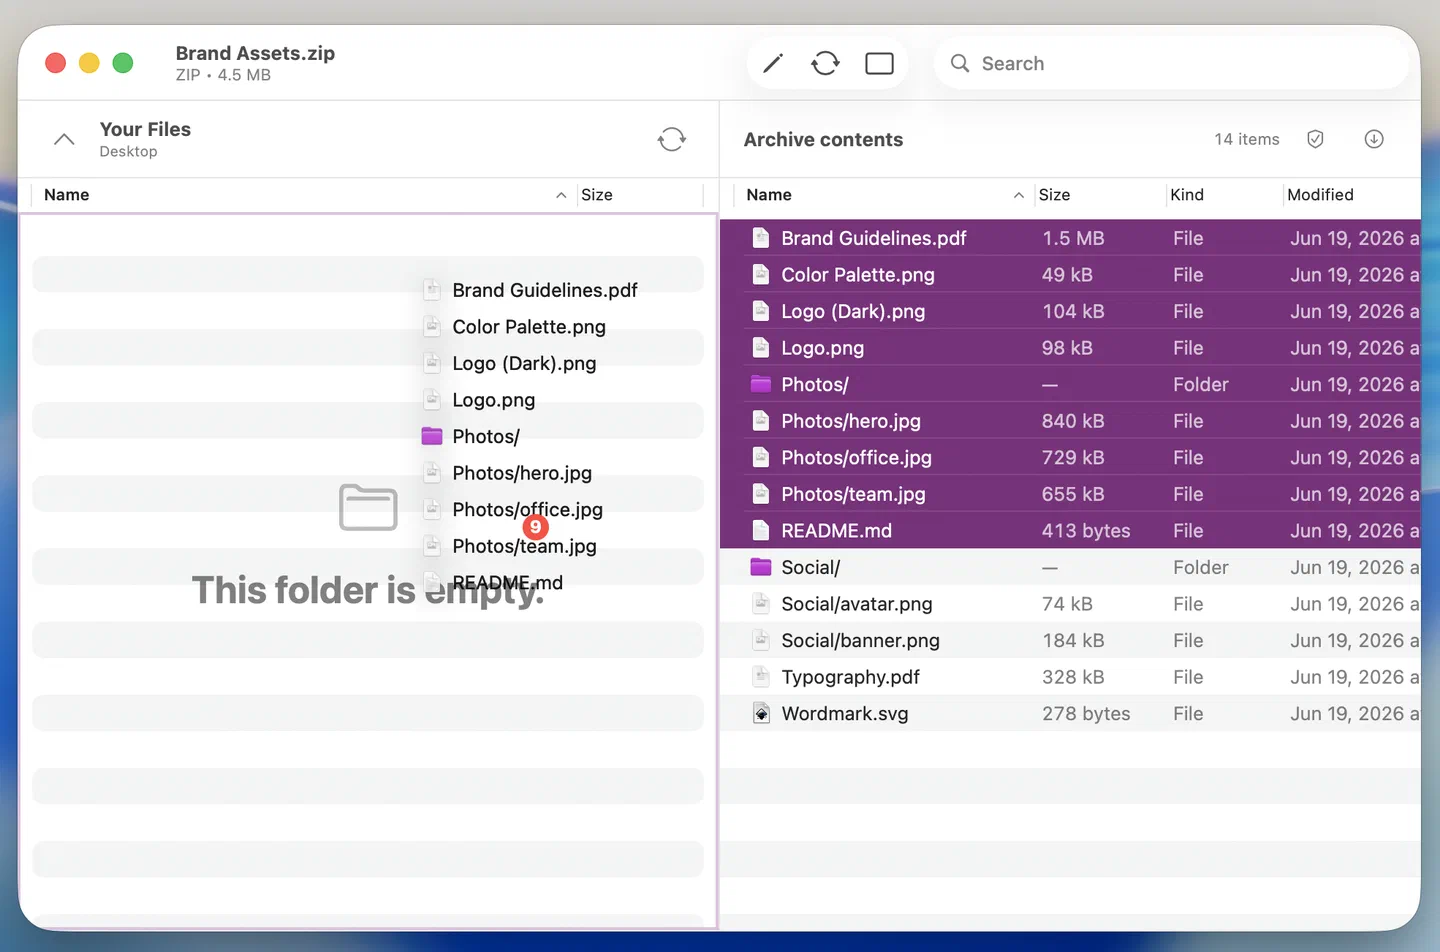
3. Extract straight to Finder via drag promise
Want one file — or a handful — out of a huge archive without extracting everything?
In the Loaded window, select the entries and drag them directly to a Finder window (or to the desktop). Purrchiver uses a drag promise: it doesn’t extract until you drop, and extracts only the items you dragged. Bypasses the “extract everything just to get these few files” pain.
Preview a file without extracting
You don’t have to extract a file to see it. Open the archive, select an entry in the right pane, and press Space — Purrchiver renders that one file through macOS Quick Look (documents, images, PDFs, and more), pulling out just that item while the rest of the archive stays packed. Press Space again, or Esc, to close the preview.
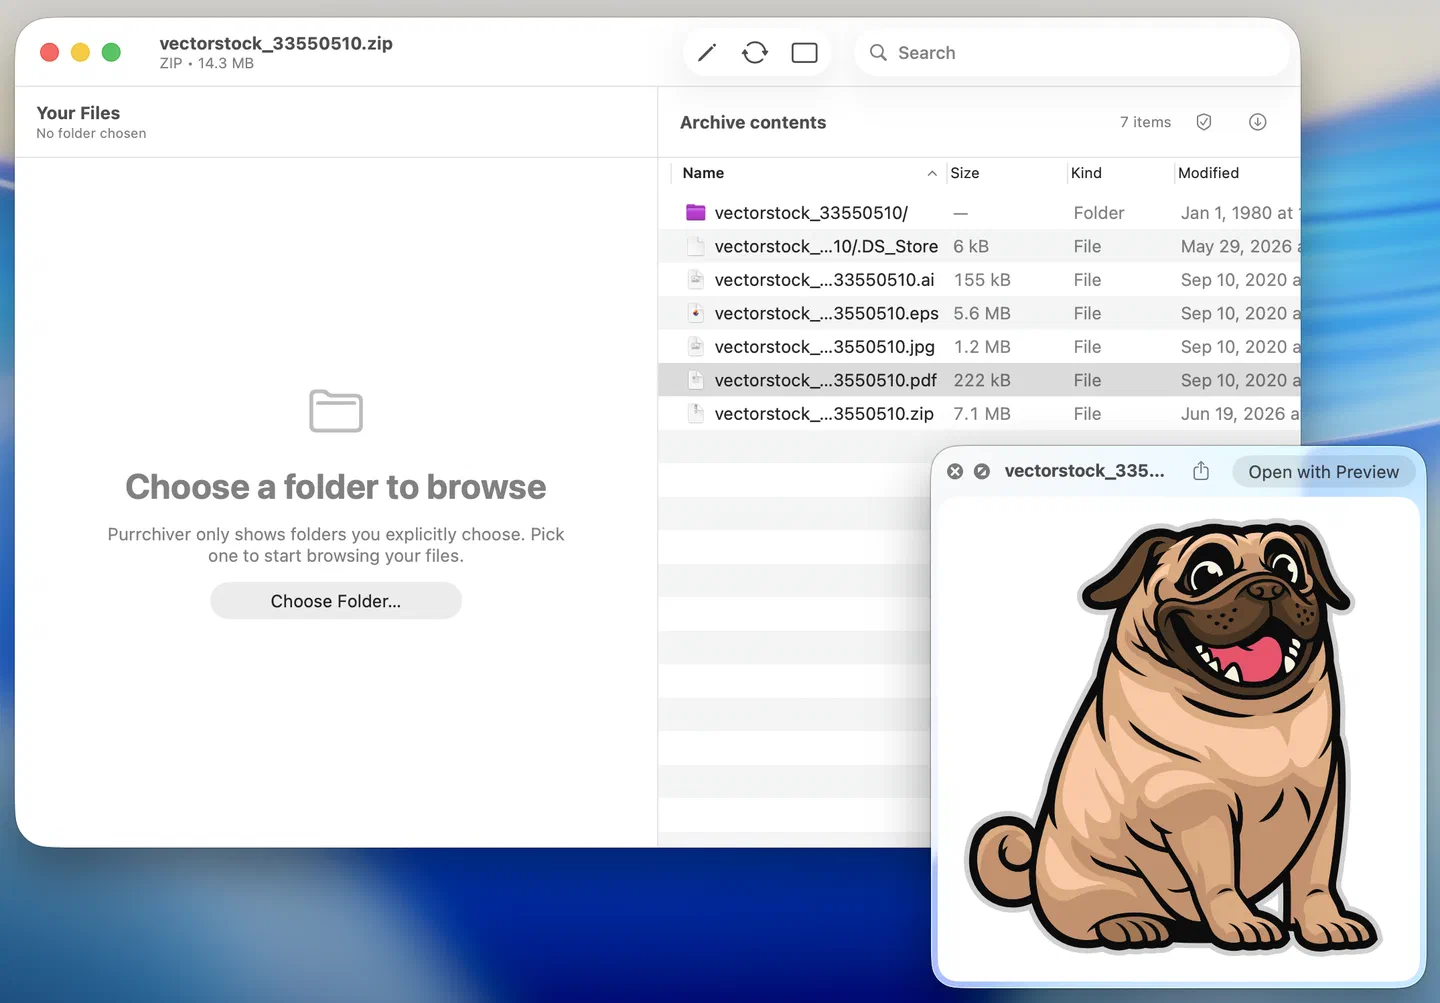
This is different from Finder’s Quick Look: pressing Space on the archive in Finder shows the file listing, while pressing Space on an entry inside an open archive shows the file. See Quick Look preview.
Extracting from an encrypted archive
If the archive is password-protected, Purrchiver prompts you for the password when you first open it (not at extract time). After that, extracting is the same as any other archive — your password isn’t requested again within the session.
If you forgot the password, Purrchiver can’t recover it. There’s no “forgot password” link, because there’s no server. See Encrypted archives for password best practices.
Extracting from a multi-part archive
Open any one of the parts (Purrchiver finds the rest automatically). Extract proceeds exactly as it would for a single-file archive — Purrchiver streams through the parts in order. You don’t need to do anything special.
See Multi-part archives for the full story.
What if extraction fails?
Common reasons:
- Wrong password — Purrchiver tells you the password didn’t match.
- Corrupt or truncated archive — Purrchiver tells you reading an entry failed; entries it had already written stay on disk.
- Permission denied — pick a different destination, or grant Purrchiver access in System Settings → Privacy & Security → Files & Folders.
- Disk full — free up space and try again.
Each case gets a specific message rather than a generic “extraction failed”. See Common errors for the full catalog.