
There are several ways to start a new archive. All of them land you in a Staging window where you review what’s being archived — the filesystem on the left, the items you’re archiving on the right. When the list looks right, click Choose options and create… to open the Create Archive sheet, the one place you choose the format, compression, encryption, split, and other options. (In Edit mode the same button reads Choose options and save….)
The sheet’s Format picker lists every format you can create — the multi-file archive containers, plus single-file stream formats when you’ve staged just one item:
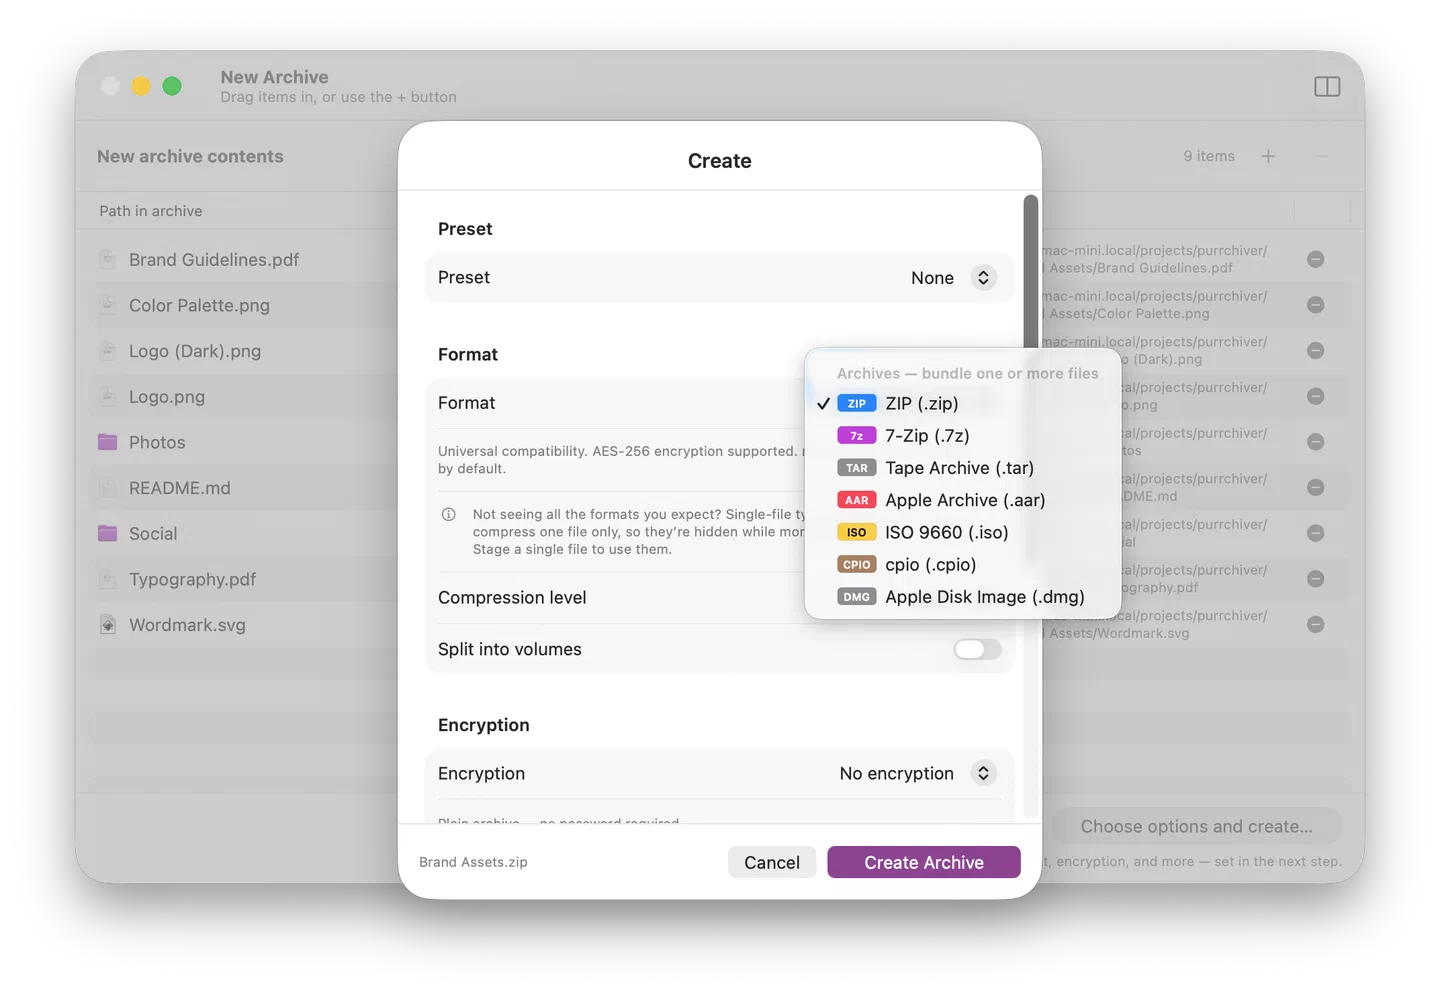
Creating ZIP, AAR, tar, .tar.gz, .tar.bz2, .gz, .bz2, and plain
DMG is free. The advanced create formats (7z, xz, Zstandard, Brotli,
lzip, lz4, ISO, CPIO, and the compressed-tar variants), all encryption,
and splitting into volumes are part of the one-time $9.99
unlock — paid options show a lock badge in the picker, and Purrchiver
offers the unlock the moment you pick one. See
What’s free vs. the unlock for the full breakdown.
1. Drop files on the dock icon
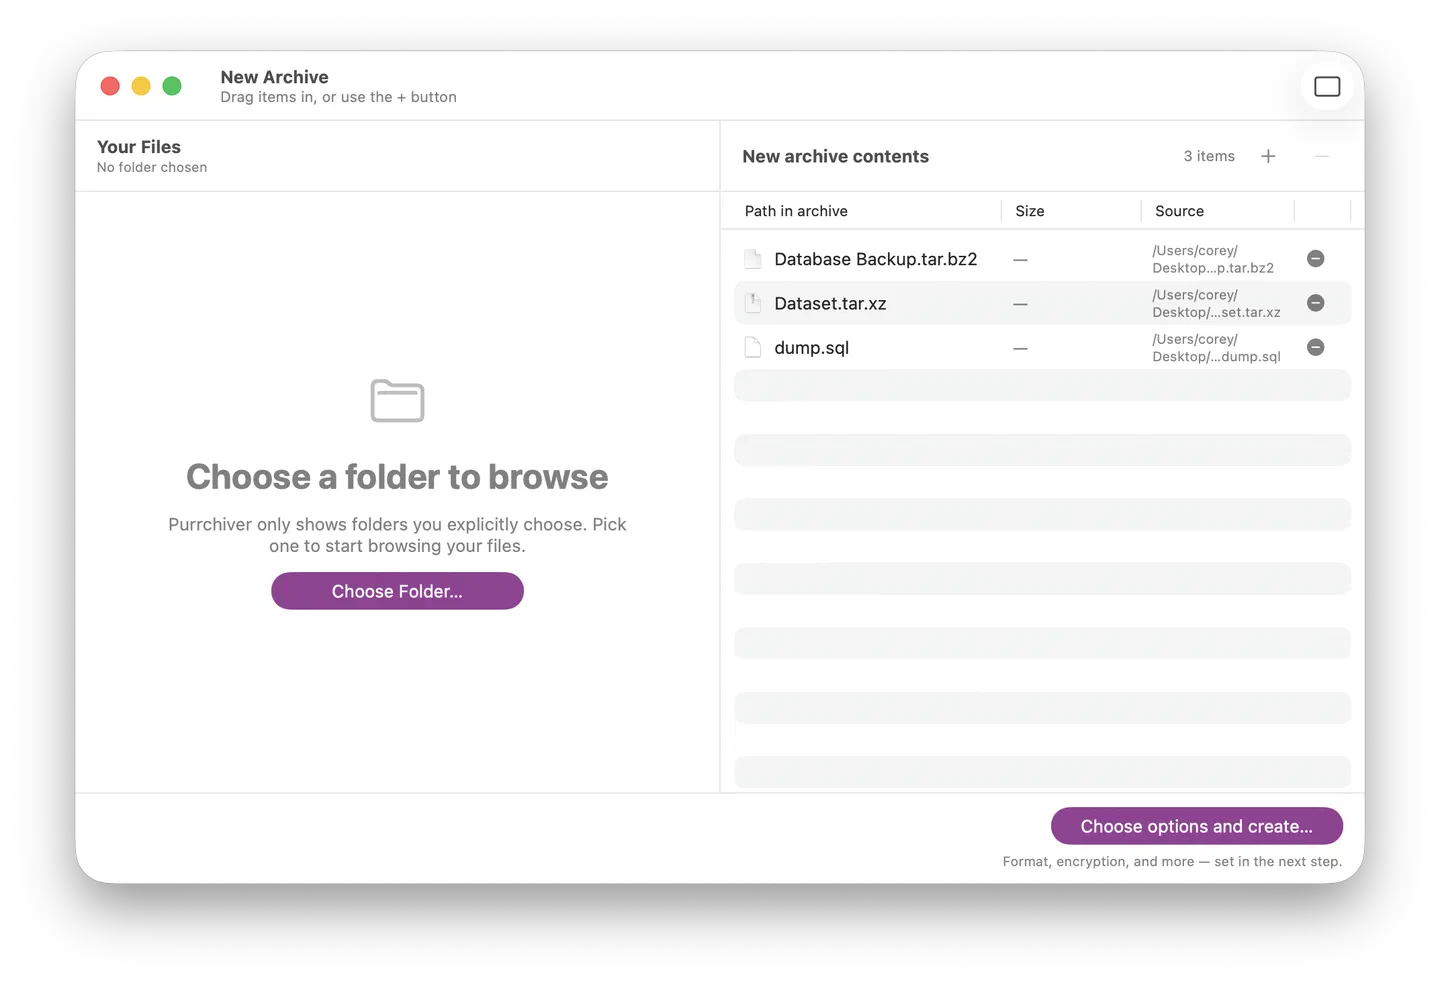
Drag any combination of files and folders onto the Purrchiver dock icon. A new tab opens with the dropped items staged on the right side and the filesystem on the left:
2. File → New Archive (⌘N)
Opens an empty Staging session. Add files by dragging them in from Finder, from the left filesystem pane, by clicking the + icon in the right pane’s header (tooltip “Add items to the archive”), or — on the empty state — the Add Items… button.
3. Finder right-click → Services → Compress using Purrchiver
Select one or more files or folders in Finder, right-click, and pick Services → Compress using Purrchiver. Purrchiver opens a Staging window with your selection pre-loaded as files-to-compress. From there, click Choose options and create… to open the Create Archive sheet and pick a format, optional password, and other options.
If you don’t see the Services submenu, enable the item under System Settings → Keyboard → Keyboard Shortcuts → Services → Files and Folders.
The Create Archive sheet
When you click Choose options and create… (or use a Finder Service or Tools-menu verb that opens it directly), you see:
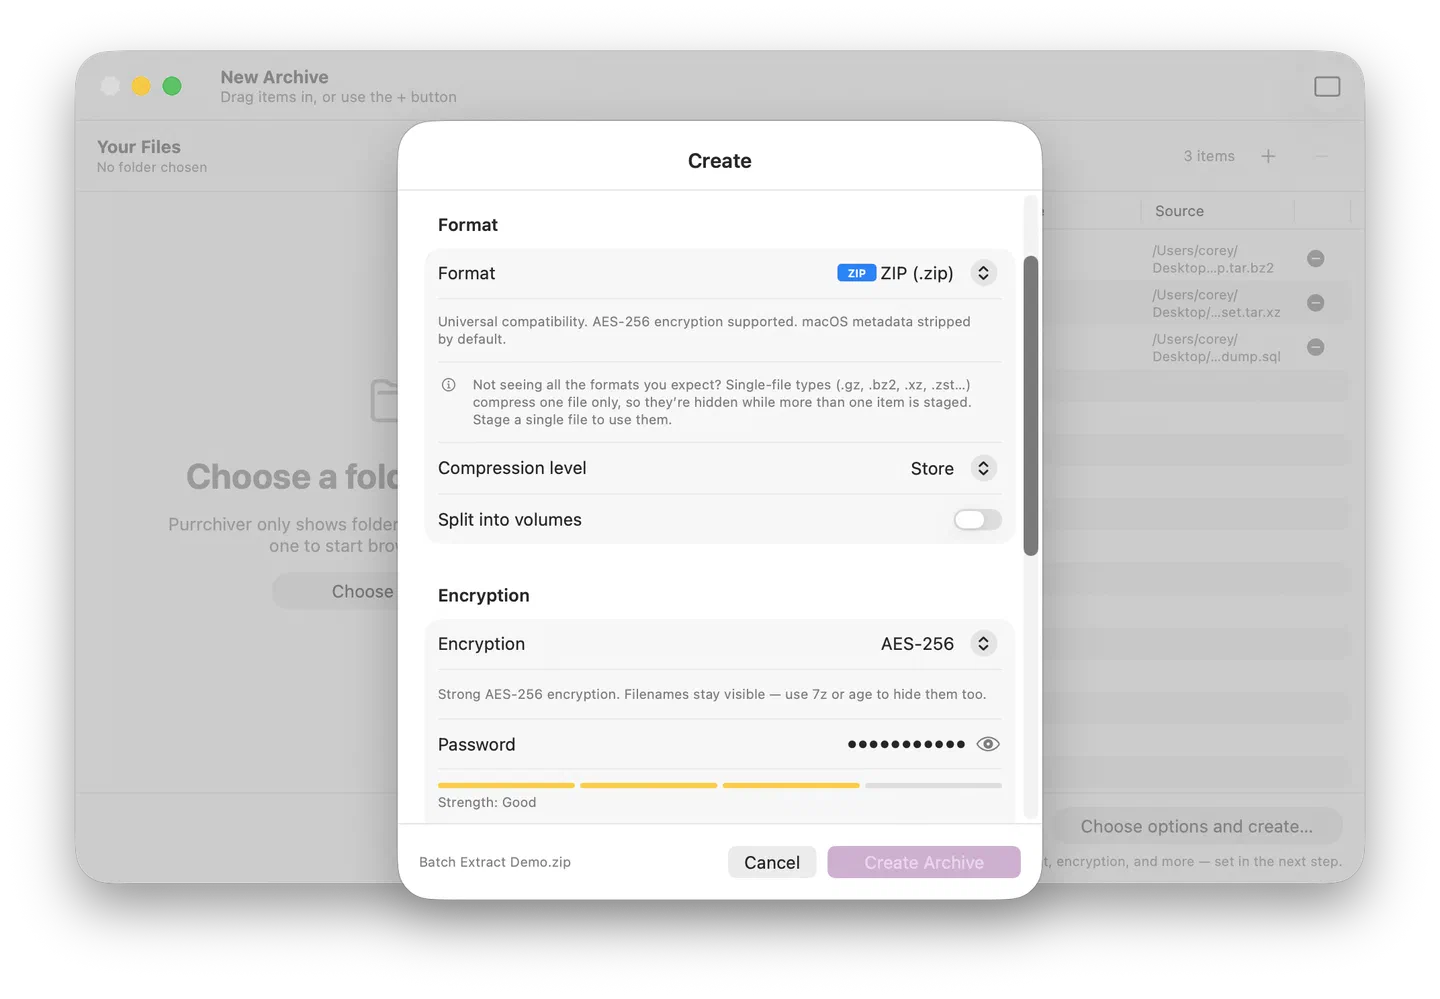
Format
Pick from ~15 picker entries (the picker collapses the 8-member tar family into a single “tar” entry, so the 22 underlying format cases show as roughly 15 visible rows). Each option has a short inline tooltip explaining when to use it. The most common choices:
- ZIP — cross-platform safe. The default. Use it unless you have a reason not to.
- 7z — best compression. Good if both you and the recipient have a 7z-capable tool.
- tar + gzip (
.tar.gz) — Unix standard. Use it when sending to Linux/server folks. - tar + zstd (
.tar.zst) — modern fast Unix archive. Faster than.tar.gz, similar ratio. - AAR (Apple Archive) — Apple’s native format. Tiny, fast, Apple-platform-only.
Format support has the full list with notes on each.
Compression level
Four choices: Store / Fast / Normal / Best.
- Store — no compression, just packaging. Use for already-compressed content (JPG, MP4, etc.) — saves zero space and processing time on those.
- Fast — quick, modest compression. Use when speed matters.
- Normal — balanced (default). What you want most of the time.
- Best — slowest, smallest. Use for archival or distribution.
Encryption
The Create Archive sheet has an Encryption picker with three choices — None, a built-in scheme (AES-256), and age:
- None — no password; the archive is written in the clear.
- Built-in scheme (AES-256) — uses the format’s own native
encryption. Available for ZIP, 7z, AAR (Apple Archive),
and DMG:
- ZIP — AES-256. The broadly compatible choice.
- 7z — AES-256. Encrypts file contents; filenames in the listing stay visible.
- AAR (Apple Archive) — produces an encrypted Apple Archive (
.aea) that encrypts the whole archive (filenames too). Requires a password of at least 32 characters; Apple-platforms-only. - DMG — AES-256. Encrypts the whole disk image.
- age — wraps the finished container or stream in an
age-encrypted envelope. Because it wraps the output rather than relying on a format’s native encryption, every format can be age-encrypted — including the tar family, ISO 9660, CPIO, and the single-stream formats that have no built-in scheme of their own. See age encryption.
So: pick age if you need a password and the format has no built-in scheme (tar family, ISO, CPIO, gzip/xz/etc.), or simply want age across the board; pick the built-in scheme when you’re using ZIP, 7z, AAR, or DMG and want native, broadly compatible encryption.
When you pick the built-in scheme or age, the dialog expands to show two password fields (entry + confirm) and a strength meter below the first field. Creating encrypted archives is part of the one-time $9.99 unlock — opening and extracting encrypted archives you receive is always free.
The confirm field is non-optional — single password fields with no confirmation are how people accidentally lock themselves out of their own archives. The strength meter is local-only (no network, no AI, no SDK) and tells you what would make the password stronger.
Purrchiver verifies every encrypted archive after creation by default. If your password somehow didn’t work to open the archive you just created (it won’t — but if it didn’t), Purrchiver would tell you immediately. You can change this in Settings → Compression → Verify archives after creation; the Never setting disables verification entirely.
See Encrypted archives for the full story.
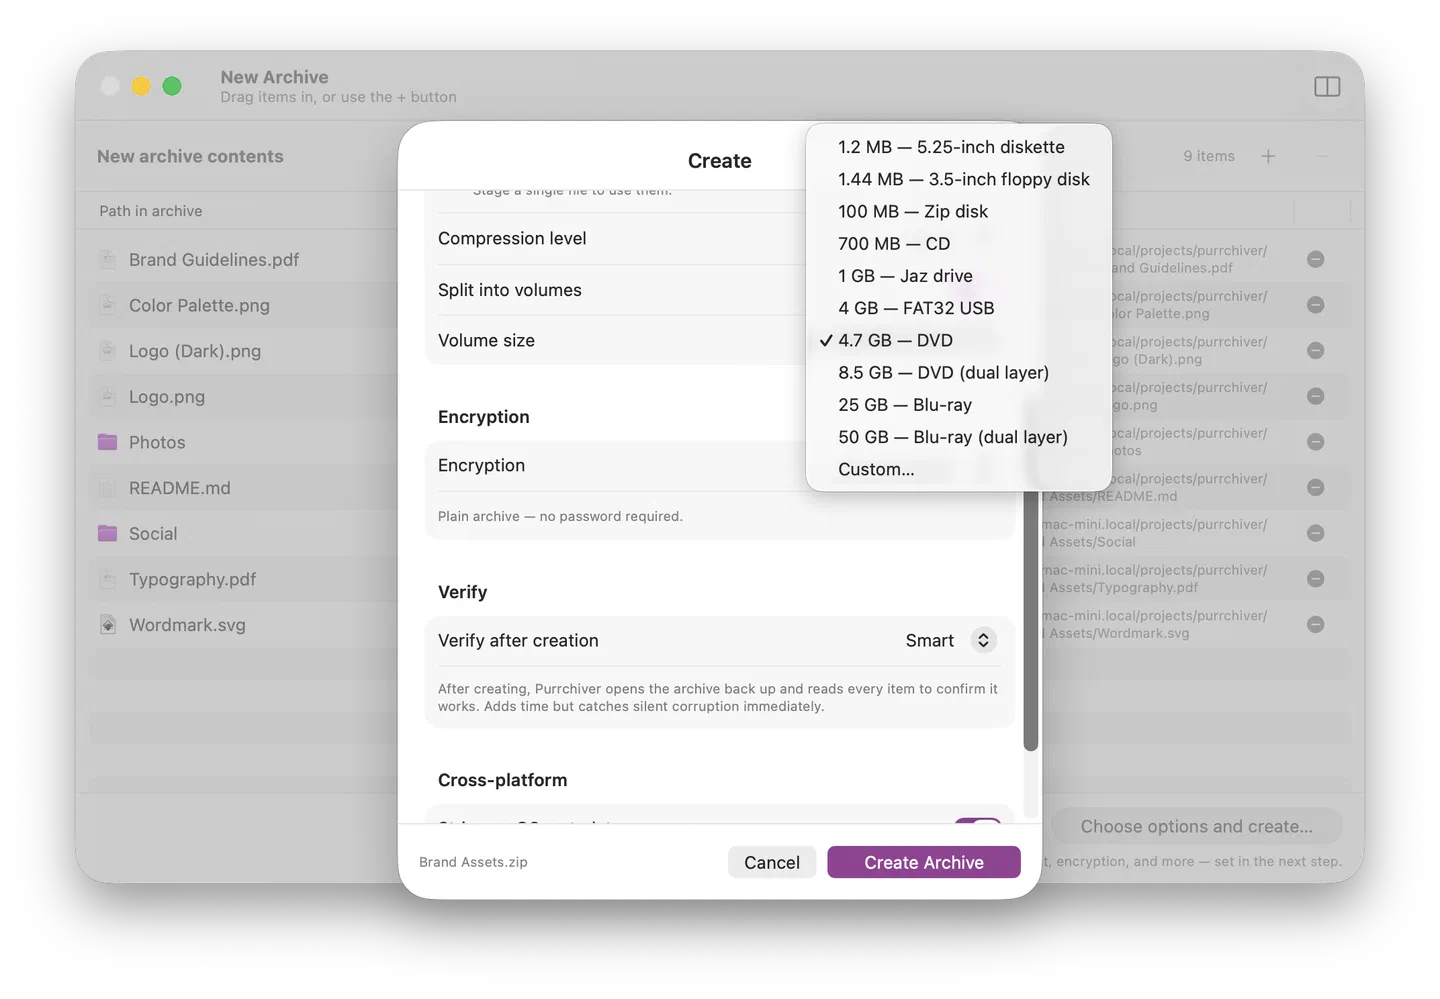
Split into volumes
Turn on Split into volumes and pick a per-volume size (presets from
floppy-sized through Blu-ray, plus Custom) to write a multi-volume set.
Supported for ZIP, 7z, and the compressed-tar variants (.tar.gz /
.tar.bz2 / .tar.xz / .tar.zst / .tar.lz / .tar.lz4). Purrchiver
writes numbered .001 / .002 / … volumes that any modern archive tool
recombines automatically. Writing a split set is part of the one-time
$9.99 unlock (reading split sets you receive is always free).
Split-volume extraction works too — point Purrchiver at any one
part of a split set you received (.part01.rar, .r00/.r01, .z01,
.7z.001/.002, …) and it scans the parent folder, finds the rest,
and reads them as a single archive.
See Multi-part archives for the full read + write story.
Strip macOS metadata
Shown for ZIP only (default ON). Strips the ._* ghost files
that macOS adds and that Windows / Linux recipients see as clutter.
You can toggle it per-archive in the Create Archive sheet.
For AAR, 7z, and the tar family, the toggle isn’t shown — those formats either handle macOS metadata natively (AAR) or don’t carry it in a way that pollutes cross-platform extraction.
Output filename + location
The sheet shows a live preview of the output filename, defaulting to the
source’s name + the format’s extension (MyProject/ → MyProject.zip).
When you click Create Archive, a standard macOS save panel opens
pre-filled with that name — confirm it or change the name, and pick where
the archive lands.
Presets — save your favorite settings
If you create archives with the same settings repeatedly — say, “ZIP, Best compression, AES-256 encrypted, no metadata, save next to source” — save them as a Preset.
Presets are created and managed in Settings → Compression → Presets. Add or edit a preset there (name, format, compression level, encryption, symlink policy, verification mode), and it appears in the Preset dropdown at the top of the Create Archive sheet. The preset marked Default loads automatically every time you start a new archive.
See Compression presets for the full workflow.
What happens when it’s done
Compress progress runs in the staging footer. On success an inline “Created <filename>” confirmation appears right there in the footer (with a quick way to reveal the new archive or close), the archive is verified per your Verify-after-creation setting (Smart by default — every encrypted archive, plus unencrypted archives under 500 MB; each entry re-read and passwords confirmed), and that’s it. No popup. No modal. No interstitial. No ad. No banner.
If you turned on completion notifications in Settings → General, you’ll get a standard macOS notification — style and sound follow your System Settings → Notifications → Purrchiver preferences.
Tips
- Drag-drop is faster than the menu for most cases. Drop files on the Purrchiver dock icon and the staging window opens with them pre-loaded — then choose options and create.
- Format is sticky. Purrchiver remembers your last-picked format between operations. The compression level comes from your Settings → Compression default (set it once there), and new Create Archive sheets start unencrypted unless a preset turns encryption on — so if you always want AES-256, save it in a preset (see below).
- Save a preset for your common case. If you always reach for “ZIP, Best, AES-256, strip macOS metadata,” save it once as a preset and pick it from the sheet’s Preset dropdown — one click instead of reconfiguring every field.
Related
- Compress or encrypt a single file — when you have just one file, no container needed
- Editing an existing archive — for modifying instead of creating fresh
- Encrypted archives — password best practices
- age encryption — encrypt any container or file
- Multi-part archives — split-volume details
- Compression presets — save and reuse option bundles
- Settings — change the defaults